
Tera Online Gunner PvE Build Gears Skills and Glyphs
Tera Online Gunner PvE Build Gears Skills and Glyphs.
The Gunner is a class that has been introduced in the expansion TERA: Fate of Arun.
This class is only available to female High Elves, Castanic and Elin races.
The Gunner’s best abilities rely on a resource called Willpower which is built using a variety of the skills available to the gunner. Once the gunner reaches 100% willpower, she’s able to unleash a huge AoE skill in front of her blowing away anything that stands in her path.
The Gunner class also includes a summonable robot named HB-7 which can be blown up to stun enemies or used to quickly pull the gunner out of harms way. HB-7 is also able to heal the gunner when idle does small amounts of damage to mobs after the use of skills such as Obliteration and Arcane Barrage.
Gunner PvE Build – Official Description
Gunners are fast-moving, high-DPS ranged combatants who never stops to ask questions—they’re too busy shooting first!
A gunner combines fast-paced play with strategic use of summoned constructs, and positions herself to make use of the best skills for any given situation.
A unique aspect of the gunner is how she uses Willpower to activate devastating attacks.
A gunner generates Willpower every time she kills an enemy, and when her meter is full…look out! Willpower fades rapidly when not fighting, so don’t stop shooting until every enemy is rekt!
Gunner PvE Build – Crystals

Gunner PvE Build – Gears
Weapon


Explanation:
Top line:
There are 4 options for your top line roll:
Increases damage by 9.3% when attacking enraged monsters.
Decreases skill cooldowns by 7.2%.
Increases attack speed by 9%.
Increases crit factor by 18.
The enraged roll is the best choice between of all the options as it gives the most damage output mathematically.
Skill cooldown is not a bad choice. However, it is inferior to the enraged roll since its damage increase is technically lower; as a result, your rotation would be completely different and suboptimal with it. Attack speed is to be avoided since AB and BF do not benefit from it.
Crit factor roll is bad on almost all classes because its total damage increase outweighed by enraged roll or skill cooldown roll.
Bottom line rolls:
Increases damage by 9.3% when attacking enraged monster
Increases damage by 6.9% when attacking from behind
Decreases skill cooldown by 7.2%
Increases damage by 6%
You should roll for the 3 damage increases on the bottom lines of their weapon since they are vastly superior to the other rolls. Some might say that crit power is a viable fourth roll since Arcane Barrage has a 100% crit chance, but it is not the optimal roll.
Assuming you are using full red dyads and a crit power VI scroll, your crit power should be at 8.10. By adding 0.3 crit power to that total amount, you are only increasing your crit damage by 3.7%. Crit factor roll is still not a viable fourth roll, since you are able to obtain crit factor easily from other sources such as accessories.
Cooldown reduction is the best fourth roll since its utility outweighs every other fourth roll as it allows you to use more skills in a fight which in return gives you more Willpower generation.
Gunner PvE Build – Chest


Explanation:
Originally, AB damage roll was actually superior to Replenish CD; however, after the recent nerf to AB (DS2 patch), this roll has lost some of it’s value.
As of right now, Burst Fire’s damage is actually much higher than Arcane Barrage, so we want to focus on building as much Willpower as possible.
It is however, much harder to adopt a Replenishment roll playstyle. Players with low ping should try to roll for Replenishment CD, as it allows them to orient their playstyle to maximize Willpower gain for Burst Fire.
Players with high ping should opt for the AB damage roll as it allows them to still deal decent damage by focusing less on Burst Fire.
Etchings:
 Pumped III weapon and gloves or a combination of Keen III* and Pumped III.
Explanation on etchings:
Double CDR etchings aren’t bad, but the setup is not optimal for PvE.
The utility of CDR etchings is to do your rotations faster since they have cooldown reduction stats and attack speed stats (which synergizes well with each other). If you have too much CDR but not enough attack speed, you will find that a lot of your skills are up before you even finish your rotation.
The problem with gunner is that they don’t benefit from attack speed, so CDR etchings basically only gives you cooldown reduction but no attack speed.
The best gunner rotation for optimal DPS does not require cooldown reduction.
Also, the main reason people build CDR on gunner is to use Arcane Barrage more often.
The problem with that is it doesn’t actually boost your damage, because gunners don’t rely 100% on Arcane Barrage. So a lot of times, I have AB up but I don’t cast it because I’m using Burst Fire.
Pumped or keen etchings are the way to go, since they gives you more damage in both Burst Fire/Arcane Barrage which contribute about 55% of your dps (23% for AB and 32% for Burst Fire).
* Note: Depending on the amount of crit you have, One Keen III might be necessary if you are running with a power innerwear.
Half Power Half Crit Build vs. Full Crit Build
Time Bomb has a 100% crit rate (if done correctly), Arcane Barrage has a 100% crit rate, and Burst Fire has a 80% crit rate.
Arcane Barrage is roughly 23% of your damage, Burst Fire is roughly 32% of your damage, and Time Bomb is roughly 10% of your damage.
Therefore, we can assume that Arcane Barrage, Burst Fire, and Time Bomb count as 70% of your damage on average, and the other 30% is the DPS contributed by the rest of your skills.
In short, try to aim for 180 total crit rate (47+133) and then from there on build as much power as you want.
After further testing in the new DS2 patch, I have concluded that a slightly crit oriented build is actually much better (around 20-30 extra crit factor), but harder to play with.
With the recent 10% nerf to Arcane Barrage, prioritizing Burst Fire has become even more important. Prioritizing Burst Fire over Arcane Barrage is actually a difficult thing to do, since you must manage your willpower accordingly.
If you are lacking in Burst Fire hits, the extra crit added to your new build will essentially be useless as you do not benefit enough from it since AB’s critical rate is already high. In conclusion, a ¾ crit build is actually superior if your skill level is high enough.
The usage of a carving crystal is actually very viable in this patch. You should be aiming for 90-100% crit chance on the 6th hit of Burst Fire for optimal damage.
Accessories:
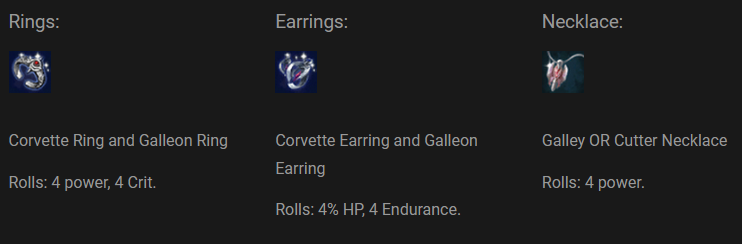
Brooch:
![]()
Empowered and Quickcarve brooch*
Rolls: 6 power, 3 crit.
Explanation for brooch:
Empowered Brooch is superior to Quickcarve* because gunners have high critical chance on most of their skills. Having Empowered will allow you to do more raw damage. Quickcarve Brooch will affect the critical rate of Bombardment, Mana Missile and Burst Fire and the attack speed bonus gained from it is mostly useless (unless for score runs).
* Note: Having a gold Quickcarve Brooch is a good idea for high score runs, you can use two brooches in a fight. Have you Empowered Brooch as your default preset.
Right before the fight, switch your brooch with the other one and activate your Quickcarve Brooch. Immediately after, switch back to your original preset and activate your second brooch later during the fight.
Do not activate both brooches at the same time, because your Empowered Brooch will simply overwrite the effect of your Quickcarve Brooch.
Innerwear:
![]()
Fortified or Reinforced*.
Rolls: 16 crit or 8 power.
* Note: Depending on the amount of crit you have, you might need to switch between a fortified or a reinforced innerwear.
Gunner PvE Build – Skills and Glyphs
Blast
Fire a shot which explodes on impact or up to 20m away.
Explanation:
Blast is your animation cancelling skill, it should be used in between each skills. Blast makes up around 5% of your total damage output.
(3 points) Glyph of Power: Increases skill damage by 20%.
This glyph is decent. If you Blast cancel enough, your damage should be boosted marginally.
(2 points) Glyph of Affirmation: Gain 5 Willpower on each hit.
It’s… an okay glyph. In a 1 minute fight, you usually do around 30 Blasts, so you can expect to get around 60 Willpower from this glyph during this duration.
*After further testing, this glyph is actually very good in DS2 uppers, since most fights tend to last for a very long time (5-15 mins).
(4 points) Glyph of the Swift: 15% chance to increase Attack Speed by 15% for 10 seconds.
With the amount of Blasts you should be doing in a fight, the likelihood of activating this glyph is really high. 15% attack speed may not seem a lot, but it adds up in your DPS quickly the more you use your Blast.
Bombardment
Target an area within 25m, then launch a volley of eleven shots with a high chance of stagger. Gain 100 Willpower for each successful hit.
Explanation:
Bombardment is your ultimate burn skill, and it should do around 5-10% of your total damage. It should be used whenever you have it up, unless you are saving it for a coordinated burn with the rest of your party. *Best used with Quickcarve or Empowered Brooch
(4 points) Glyph of Carving: Doubles the chance to crit.
Bombardment has a surprisingly low crit rate, so with the help of this glyph and a Quickcarve Brooch, you should be expecting more than 50% crit rate.
(4 points) Glyph of the Swift: Increases casting speed by 25%.
A lot of people don’t take this glyph, but in reality it could boost your damage significantly, since attack speed equates to faster cast animation; you waste less time casting a slow ability. When casting this skill, there’s a high chance of front critting the boss as some of them might move a lot, for instance, Shandra Manaya. By using this glyph, we can guarantee back crits. This glyph is especially important during high score runs where speed is crucial.
Scattershot
Fire a spread of five penetrating shots at enemies within 20m. Gain 20 WP for each successful hit, up to a max of 100 WP.
Explanation:
Scattershot is your ultimate filler skill – it should solely be used as a FILLER skill. It fills the gap b This skill should consist of 5% of your damage if used correctly. Scattershot has two uses: building up your Willpower and using it as a mobility skill. Scattershot shoots five pellets that each deal a different amount of damage.
For example: The first pellet does 100k, the second and third will do 50k, and the fourth and fifth will do 25k. You should not prioritize this skill over Arcane Barrage/Burst Fire.
(3 points) Glyph of Power: Increases skill damage by 25%.
Although this skill is used a lot in your rotation, it does minimal damage. A 25% damage boost would increase the damage of Scattershot to 6%. You can take this glyph if you have extra points left.
(2 points) Glyph of Slick: Reduces recoil by 40%.
This glyph choice is very controversial; some absolutely hate it and some love it. It’s a personal preference at this point. This glyph allows you to cast Scattershot faster (basically making it an attack speed glyph). You can use the skill’s recoil to your advantage by using it as a mobility skill when you need to reach a boss’s back or you can use the recoil glyph to cast Scattershot faster.
(1 point) Glyph of Brilliance: Reduces MP cost by 50.
Pick this glyph if you have extra points available.
Point Blank
Swing your arcannon to attack enemies within 7m. Press the skill button again to fire a second shot which moves you back.
Explanation:
Point Blank is a really unique and odd skill. It’s one of your main mobility and gap closer skills. This skill is especially useful when trying to get behind the boss when you are positioned right next to it. Point Blank has two parts in its usage: the first activation swings your character to the direction your camera is pointing at and the second activation pushes you back (read rotation section for more in-depth combos).
(3 points) Glyph of Influence: 20% chance to eliminate cooldown for Arc Bomb.
The likelihood of activating this glyph is almost nil, assuming you do 5 Point Blanks in a fight, you get one extra arc bomb… which is pretty bad.
(2 points) Glyph of Restoration: Recovers 2% of total HP on each hit.
This glyph recovers a total of 4% total HP when you use the two parts of Point Blank. If you are relying on this glyph to stay alive, then you are doing something wrong.
(3 points) Glyph of Energy: Decreases cooldown by 25%.
Depending on how much you use Point Blank, this glyph might be really useful. This skill has a relatively long cooldown of 15 seconds and when you combine this glyph with a Battle Nostrum VI, it reduces this skill’s cooldown to 9 seconds.
(4 points) Glyph of Power: Increases skill damage by 30%
Point Blank has a really low natural crit rate and a really low base damage. You should not rely on Point Blank to deal damage.
Burst Fire
Fire a penetrating shot in a line up to 20m away. Holding down the skill button continues firing as long as you have Willpower. Each successive shot* has increased skill damage and chance to crit.
Explanation:
Burst Fire is your main DPS skill, and it comprises 30% of your total damage. This skill is really ping dependant, if you have less than 120 ping, than you can hold down your Burst Fire button. Unfortunately, if you have a high ping, you need to create a macro which taps for you because you cannot hold down the button, you have to manually tap it. Burst Fire acts as a crit amplifier (read main DPS rotation section) and should be prioritized over everything else (including Arcane Barrage). It is best used when above 60% Willpower.
(4 points) Glyph of Restoration: Recovers 1% of total HP on each hit.
I have seen some gunners use this glyph. It’s not bad per say, but it is a huge waste of glyph points to rely on Burst Fire to stay healthy (it should be your healer’s job!). It is somewhat useful if you are trying to solo dungeons.
(4 points) Glyph of Affirmation: Reduces Willpower cost by 10.
One of the most important glyphs for gunners, without this glyph, you can expect to do 21 Burst Fires with full Willpower, which is not nearly enough. Therefore, we use this glyph to increase our Burst Fire hits to a total of 25, which gives us more DPS.
(2 points) Glyph of Longshot: Increases range by 5 meters.
With the addition of the new rare glyphs, you get a few extra glyph points. This glyph is really a personal preference. It is particularly useful on the third boss of Kalivan’s Dreadnaught and Shandra Manaya (Floor 22 of Dreadspire).
*Note: each successive burst fire hits will increase your crit chance by a certain amount (please refer to the FAQ section for the Burst Fire crit rate calculator) and will increase your damage by adding the first hit’s damage on each hit, for example: your first hit will do 10k damage, the second one will do 20k, the third one will do 30k and so on until the 6th hit (which caps out at 60k damage).
Time Bomb
Fire a shot that explodes on impact or up to 20m away, leaving behind a Time Bomb that detonates 2 seconds later. Gain 20 Willpower on a successful hit, and 40 Willpower from the secondary detonation.
Explanation:
Contrary to popular belief, Time Bomb should not be used whenever you have it up (read main DPS rotation section). This skill is your rotation starter, it comprises of around 5-10% of your DPS and it gives a significant boost to your Willpower generation. It’s skill animation is ridiculously fast (almost as fast as Blast) which you should take advantage of.
You must position Time Bomb manually in order to get a backcrit, aim your skill on the ground (not directly on the boss), right behind the back of the boss. Click here for visual aids.
(5 points) Glyph of Power: Increases skill damage by 25%.
If you use Time Bomb correctly then this glyph will increase your total damage by a huge amount.
(2 points) Glyph of Affirmation: Gain 15 Willpower on a successful hit.
This glyph is very misleading. A lot of people think that they only get an extra 15 Willpower when Time Bomb hits a target. In reality, Time Bomb will pulse 8 times, and each time it pulses, you generate 15 Willpower (120 WP in total). In short, you get 60 Willpower from Time Bomb itself and an extra 120 Willpower from this glyph which leads to a total of 180 Willpower or 3 extra Burst Fire hits.
Arcane Barrage
Fire an energy pulse that damages all enemies in a line up to 22m. Press the skill button again to detonate the pulse damaging enemies in a wide radius with a high chance to crit and gaining Willpower. If used within 40m of a summoned HB construct, the HB fires 5 Electric Bombs at the detonation point.
Explanation:
Arcane Barrage is one of your main damage skills and main Willpower generation skill. It comprises 20-30% of your damage and should be prioritized after Burst Fire.
There are 2 parts to this skill: on the first activation, your gunner will shoot a giant energy pulse which deals a low amount of damage and has a low natural crit rate when it touches an entity, and on the second activation, the pulse explodes dealing a huge amount of damage with an extremely high chance to crit.
Assuming you are in front of a boss, you can still get backtime by shooting your laser through it and then detonate it when Arcane Barrage reaches its back.
When gunners were released in May of 2015, people were prioritizing Arcane Barrage over everything else since people were seeing over 4 million crits and ignored Burst Fire completely. This lead to many problems, as people were running out of mana constantly and always had full Willpower.
Here is an example of why Arcane Barrage shouldn’t be prioritized and here is an example of how you should prioritize Burst Fire over Arcane Barrage. With the recent nerfs to Arcane Barrage, prioritizing Burst Fire is even more important than ever before. Another interesting mechanic of Arcane Barrage is electric bombs.
Whenever you have HB-7 summoned, your robot will fire 5 projectiles at the detonation point of your AB. The positioning of your robot does not matter if you get backtime or not, it is the positioning of your character.
If you are positioned behind the boss and your robot is shooting it’s electric bombs in front of the boss, your electric bombs will back crit. On the contrary, if you are positioned in front of the boss and your robot is positioned behind, your electric bombs will NOT back crit. Here is an example of how the electric bombs work.
Replenishment
Replenish 500 MP and 100 WIllpower. May eliminate cooldowns for Scattershot and Arcane Barrage (50% chance for each)
Explanation:
Replenishment is an important part of your rotation. It gives 500 MP, 100 Willpower, and has a 50% chance to reset Arcane Barrage and a 50% chance to reset Scattershot. Normally, you should always use Replenishment when it is off cooldown. However, there are cases**where you need to delay your Replenishment, such as when Replenishment is off cooldown but Arcane Barrage still has around 2 seconds of cooldown.
*: If you have Arcane Barrage chest roll instead of Replenishment roll.
(3 points) Glyph of Energy: Decreases cooldown by 30%.
This is a very important glyph. It gives you more uptime on your Arcane Barrage and it gives Willpower quicker. Battle nostrum VI will not reduce Replenishment’s cooldown, so it is even more important to use this glyph. This will allow your Replenishment to be on a 6 second cooldown.
(4 points) Glyph of Affirmation: Gains additional 50 Willpower when the skill is used.
This glyph is very important in PvE, because it allows you to have more uptime on Burst Fire and when you combine this glyph with triple Arcane Barrage, you can do 2 Replenishments in a row which gives a grand total of 300 Willpower.
HB-7
Summon a construct to aid you, HB-7 damages nearby enemies when summoned. When you are nearby and below max HP, HB-7 aims a healing ray at you. Command: Stay/Follow, COmmand: Recall, and Command: Self-Destruct work while HB-7 is active and within 40m. If you move more than 60m from HB-7, it will teleport to your side. Lasts up to 30 minutes.
Explanation:
HB-7 is your robot follower. It shoots electric bombs at Arcane Barrage’s detonation point and will heal you for 4k HP per second when it isn’t shooting bombs.
There are multiple skills which you can only use when HB-7 is summoned: Command: Recall, Command: Stay/Follow and Command: Self-Destruct. HB-7 will also deal a large amount of damage when initially summoned.
You will be in an animation lock when you are casting the skill, however, you can cancel that animation lock with Burst Fire. Whenever you change instance, channel or log off, your robot will automatically disappear and you will need to re-summon it. This skill will knock down players and normal monsters (including BAMs) when it is summoned.
(2 points) Glyph of Power: Increases skill damage by 100%.
Probably 90% of all the gunners will exclude this glyph from their build. This glyph is VITAL for your standard rotation. The glyph description might be somewhat misleading — many people believe that it increases the damage of electric bombs. In reality, it only increases the damage for when it is summoned, which is still a very good bonus.
(3 points) Glyph of Power: Increases your skill damage by 20%.
An increase of 20% to one of your hardest hitting skill is a really big boost in damage. You will definitely notice a huge difference in numbers when you apply this glyph in your build.
(2 points) Glyph of Affirmation: Gain an additional 15 Willpower on each hit.
Combined with Replenishment, you can expect huge Willpower generation with this glyph. Although it may seem small, 15 WP on each hit adds up a lot on the long run.
You generate 15 Willpower when you Arcane Barrage touches the boss and another 15 when you detonate it, so you get a total of 30 extra Willpower on each Arcane Barrage which leads to a grand total of 250 Willpower from one Arcane Barrage.
If you combine this glyph with triple Arcane Barrage (read rotation section) you will get 750 Willpower in less than 5 seconds.
(3 points) Glyph of the Swift: Increases Attack Speed by 30% until Arcane Barrage detonates.
This is an important glyph in PvP, but it has minimal usage in PvE. When you use Arcane Barrage in PvE, you want to detonate it as fast as possible since you need to execute your rotation as fast as possible. In PvP, there are a lot of factors when fighting another player, so you rotation is extremely flexible which allows you to do whatever you want.
Combine this glyph with Rocket Jump and you will find that your mobility is insane. In PvE, your rotation is always the same, so you cannot allow yourself to lose any time. However, this glyph is incredibly useful on the 22nd floor of Dreadspire.
ST-4
Summon a construct to aid you in combat. Throw ST-4 at a spot within 18m, and it will continually attack enemies within 18m for 45 secs. Command: Self-Destruct works while ST-4 is active.
Explanation:
ST-4 is a useful tool. You can place it anywhere you want and it counts as a body. You can use it to take debuffs (third boss of KDNM/KDHM, Perimos blue laser, Desolarus curse, Hrathgol curse). You can stun opponents with Command: Self-Destruct.
Apart from that, this skill doesn’t have that many uses. Its damage is awfully bad, each turret hits will deal 3k white damage and it’ll most likely die in one hit. You shouldn’t bother glyphing this skill.
Rolling Reload
Dodge enemy attacks and eliminate the cooldown for Scattershot. Cancels all skill animations except for that of Balder’s Vengeance. You are immune to damage while Rolling.
Explanation:
Rolling Reload is your most important movement ability. It’s an i-frame and it’s also an animation canceller. If used in conjunction with Rocket Jump, it will allow you to travel a great distance. It also resets the cooldown of Scattershot.
(3 points) Glyph of Energy: 35% chance to eliminate cooldown.
This is a great glyph, it gives you a chance to reset your i-frame which can be extremely helpful when there are multiple upcoming attacks that you must avoid or if the boss tends to turn around often (you can reset your roll multiple times). Keep in mind that you shouldn’t rely on this glyph for your positioning, you should always assume that Rolling Reload will never reset. Think of this glyph as a luxury. Also, since you are resetting your Rolling Reload, you will also reset your Scattershot.
(3 points) Glyph of Powerlink: Increases skill damage of Scattershot by 20% for a few seconds.
This glyph is somewhat similar to Empowered Scattershot. As we do not prioritize Scattershot in our rotation, we should not have any use for this glyph unless you have extra points available.
Gunner PvE Build – Rotations
Priority list
- Bombardment
- Time Bomb → HB-7 → Burst Fire
- Time Bomb → Burst Fire
- Burst Fire
- Arcane Barrage and AB resets
- Replenishment
- Mana Missile
- Scattershot
- Arc Bomb
Triple Arcane Barrage rotation

* Note: It would be very wise to place Recall right next to Replenishment in your keybindings.
Arcane Barrage → Replenishment → Recall → (cast Arcane Barrage again if reset) → Replenishment → (cast Arcane Barrage if reset)
This rotation is optional, but it gives a significant boost in DPS since it has the potential to deal an extra 2-3 million damage and generate a lot of Willpower.
Basically, you want to use Recall right after Replenishment in order to avoid Replenish to go on cooldown. You want to Recall 0.25 seconds after you Replenish, otherwise it will go on CD. If you do it correctly, you first Replenishment shouldn’t give you mana and the second one will give you the 400 MP.
If you get mana from the first one, that means Replenish will go on cooldown. Since Replenishment has a 50% chance to reset Arcane Barrage, you may still not be able to get 3 Arcane Barrages with this rotation let alone 2 Arcane Barrages. However, you will still get the Willpower from the two Replenishments (300 guaranteed WP).
The odds of getting 1 Arcane Barrage are 100%, the odds of getting 2 Arcane Barrages are 50% and the odds of getting 3 Arcane Barrages are 25%. If you do not reset any Arcane Barrage, you will generate 550 Willpower, if you reset Arcane Barrage once, you will generate 800 willpower and if you reset Arcane Barrage twice, you will generate 1050 willpower.
Sometimes you can only use this rotation under certain circumstances. For example, on the second boss of FINM, you must time your Recall with the jump mechanic. Since you never know when he is going to do that mechanic, you cannot risk wasting your Recall before he does the jump.
This principle can also be applied on the second boss of TSHM. In other words, you are maximizing your DPS despite being forced to use your Recall on insta-death mechanics. The purpose of this rotation is to sacrifice survivability for more damage, so you must plan ahead and react accordingly to the boss’s pattern without relying on Recall to avoid sustaining severe damage.
You cannot use this rotation on Yana in TSHM/TSNM and High score runs (your HB-7 will heal you above 50% HP if you are using the Slaying crystal).
Mana Missile rotations
* Note: always try to chain your Mana Missile with one of these rotation to effectively cancel out the animation lock at the beginning of the skill’s activation in order to maximise DPS. A popular myth with Mana Missile is that you can chain Arcane Barrage with Mana Missile.
This DOES NOT work, you should simply Blast to cancel Arcane Barrage’s animation lock.
3A

Recall → Mana Missile
This combo is situational, it’s not even that good if you want to use triple Arcane Barrage since that combo requires Recall.
If you do not wish to use triple Arcane Barrage, then this combo is the most effective one. This combo should only be used when you need to i-frame unblockable damage (lines at Kumas boss in TSHM or the jump mechanic at the second boss of FINM).
3C
![]()
![]()
Burst Fire → Mana Missile
If you still have Mana Missile up, then this is the second best combo to use after 3B. Normally, after Burst Fire, your Arcane Barrage should be down and you can effectively wait for your cooldowns by finishing your rotation with a Mana Missile instead of just spamming scattershot or blast.
Tips and tricks
Positioning
The hardest part of mastering gunner is positioning and it is crucial to do so. You don’t want to spend time trying to chase the boss’s back, as you will lose valuable DPS time. The only way to improve on that aspect is to practice, analyze your play and read the boss’s patterns.
You want to memorize every attack pattern of a boss fight and react accordingly to it. You have to read the boss and try to go behind his back even before he makes his move.
Your movement skills all have a different purpose. Rolling Reload is supposed to be your primary way of chasing the boss’s back when in close proximity to it.
Point Blank can be used in three different ways: to get closer to the boss, or to chase its back when Rolling Reload is on cooldown, or when you need to save Rolling Reload to i-frame an attack. Rocket Jump should be used to chase the boss when it walks around the room or in the worst case scenario when Point Blank and Rolling Reload are on cooldown.
Scattershot can be used on certain bosses (depending on their size) to reach its back when you are right next to it or to get a better position without having to walk. Try to keep walking to a minimum and use Scattershot to move around as much as possible.
Using this skill can be useful when the boss tends to turn around often, like on the first or second boss of FINM. Sometimes, you have to tank a few hits from the boss to keep Burst Firing in order to not lose the crit and damage bonus from consecutive Burst Fires. In that scenario, you should always have health potions prepared.
The whole idea is to always back crit Burst Fires as much as possible.
The difference between a good gunner and a bad gunner is the amount of Burst Fires hits in a fight. Using Scattershot and Mana Missile to dodge donut mechanics is preferable as it allows you to have maximum uptime on damage.
Sometimes, it is okay to sidecrit when you are in a bad position (most notably when you are facing Shandra Manaya) as chasing the back will actually decrease your DPS since you are taking too much time to move.
Willpower management
Your willpower is your lifeline, and managing it is extremely important. Having too much Willpower is a huge waste and not having enough is not good either. Always try to Replenish as often as possible and keep track of its cooldown.
Scattershotting for Willpower isn’t bad either, just make sure you’re using it as a filler skill. Using triple Arcane Barrage is relatively important for Willpower generation; it has the potential to net an absurd amount of WP, and it will allow you to have a smooth rotation.
Always try to Burst Fire when you have 50-60% Willpower.
